Set up MultiVendorSuite for WooCommerce marketplace mode, separate seller stores, vendor plans, commissions, withdrawals, domain workflows, and AI-powered selling tools.
Create vendor plans; the linked WooCommerce plan product is generated automatically.
04
Configure multistore or multisite
Enable WordPress multisite only when separate seller stores are required.
Prepare wildcard DNS, SSL, seller subdomains, domain mapping, and store provisioning before public launch.
Test seller store creation, renewal, domain approval, and plan downgrade behavior.
05
Run launch QA
Create a test vendor, assign a plan, and log in to the frontend vendor center.
Create or edit vendor products, place a test order, review vendor order visibility, and check commissions.
Submit a withdrawal request, review payout status, test emails, and confirm backups before launch.
Usage
Use MultiVendorSuite after installation
These sections follow the same practical pattern as a marketplace documentation article: open the screen, configure the workflow, test with demo data, and then move to production.
Configure marketplace settings
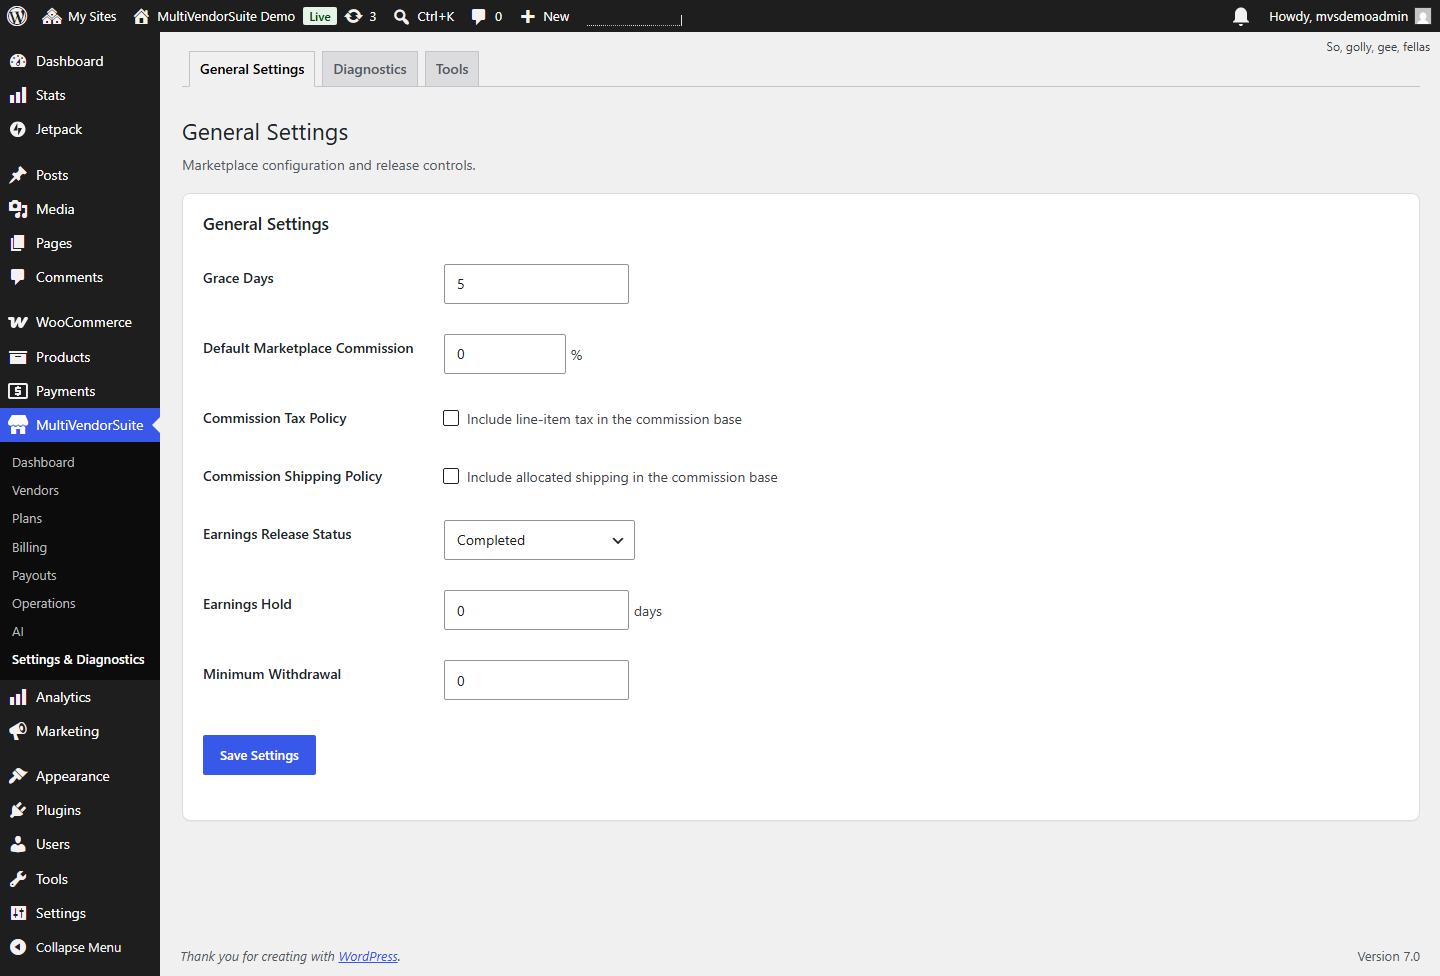
Use the settings screens to confirm marketplace behavior before sellers begin using the system.
Open MultiVendorSuite from the WordPress admin menu.
Review marketplace mode, commission, withdrawal, vendor access, and notification settings.
Save changes, then test the buyer, admin, and vendor workflows on demo data.
Create vendor plans
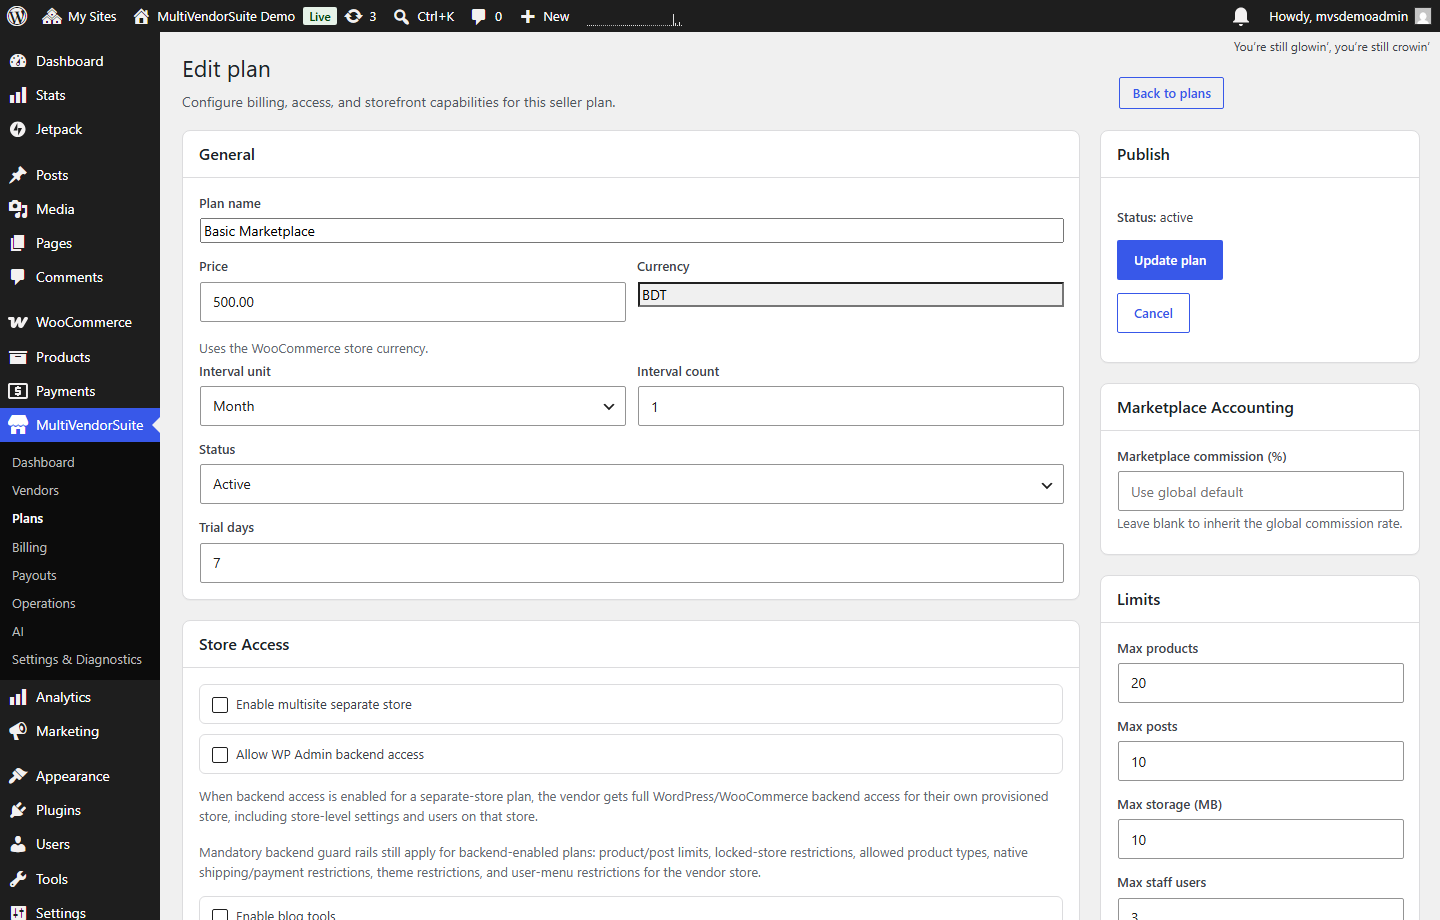
Plans control seller access. When a plan is created, MultiVendorSuite automatically creates and links the hidden WooCommerce product used for plan checkout.
Go to MultiVendorSuite > Plans.
Add a plan name, price, billing interval, status, commission, store access, and limits.
Save the plan and confirm the generated WooCommerce product is not exposed as a normal shop product.
Manage vendors
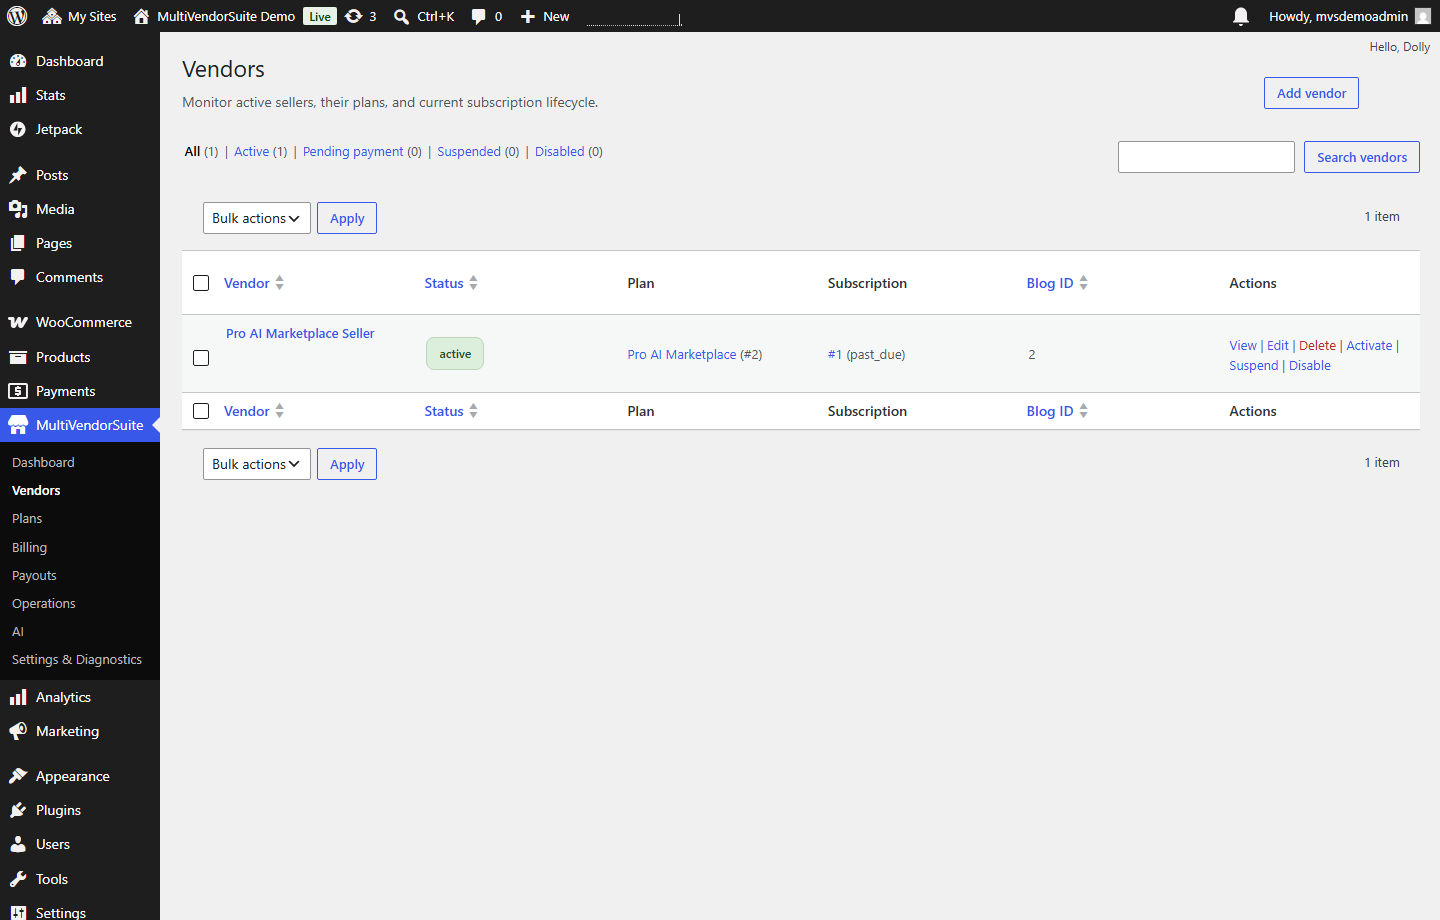
The Vendors screen helps admins review seller accounts, store records, plan assignments, status, and marketplace activity.
Review new vendor records before giving access to marketplace tools.
Assign or verify the correct vendor plan.
Check seller status, store name, linked account, and recent marketplace activity.
Use the vendor center
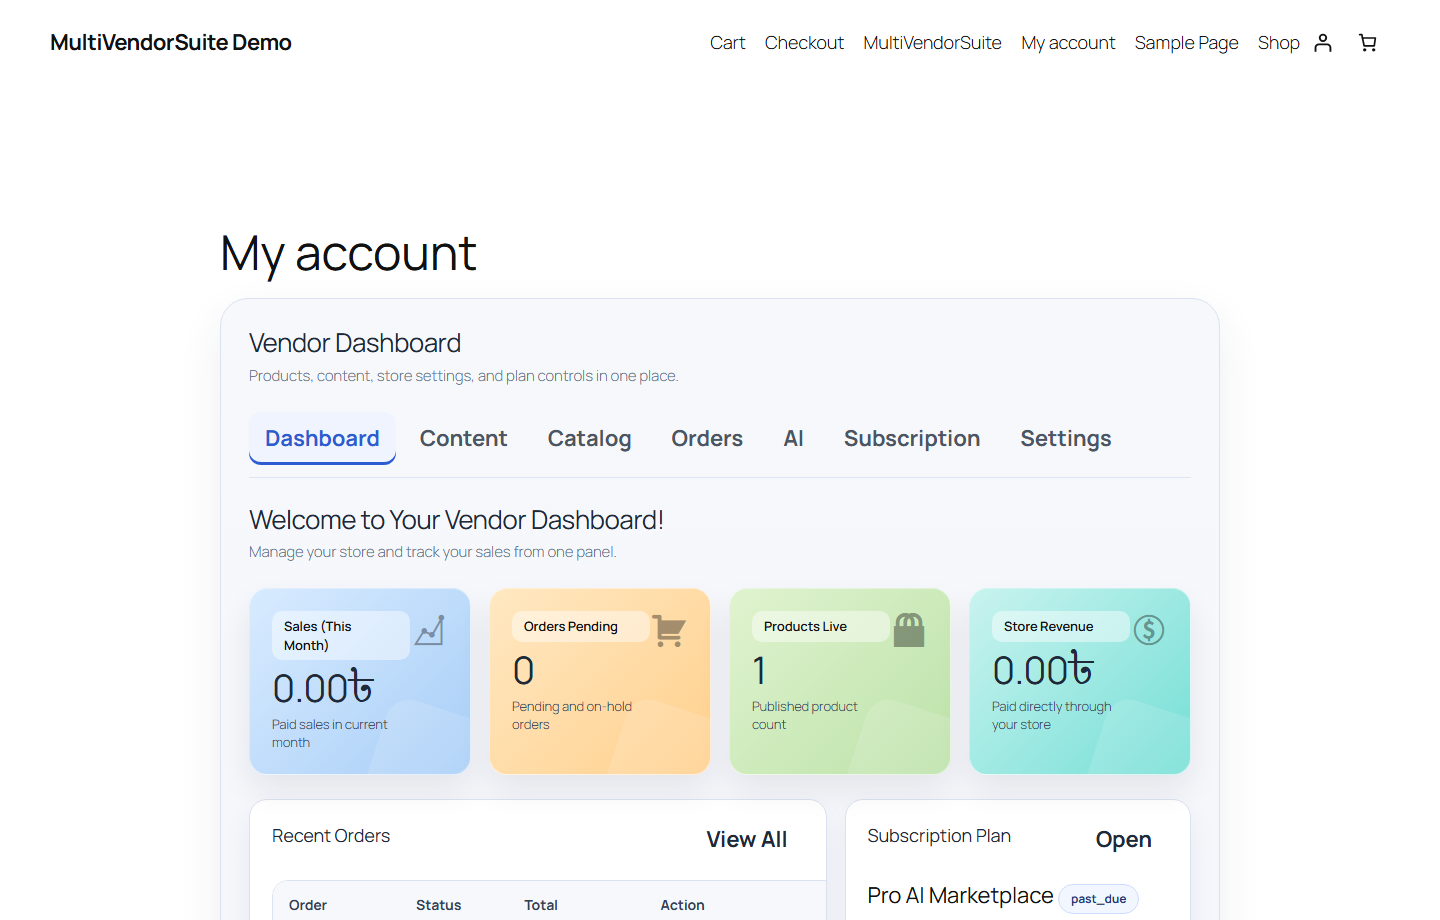
The vendor center keeps sellers out of sensitive WordPress admin screens while still giving them the daily tools they need.
Log in as a vendor and open the vendor center from My Account.
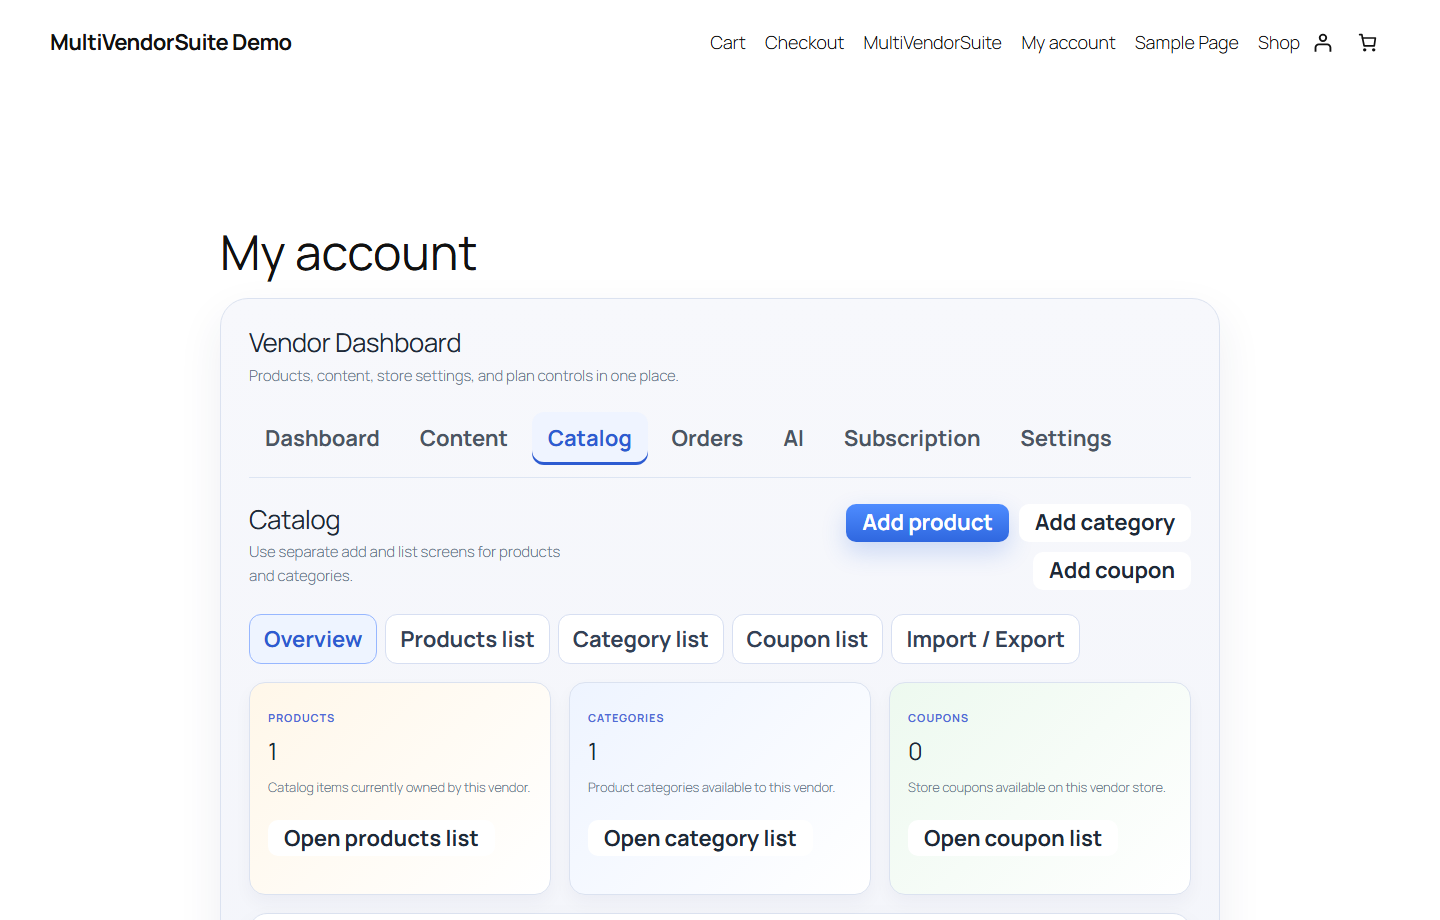
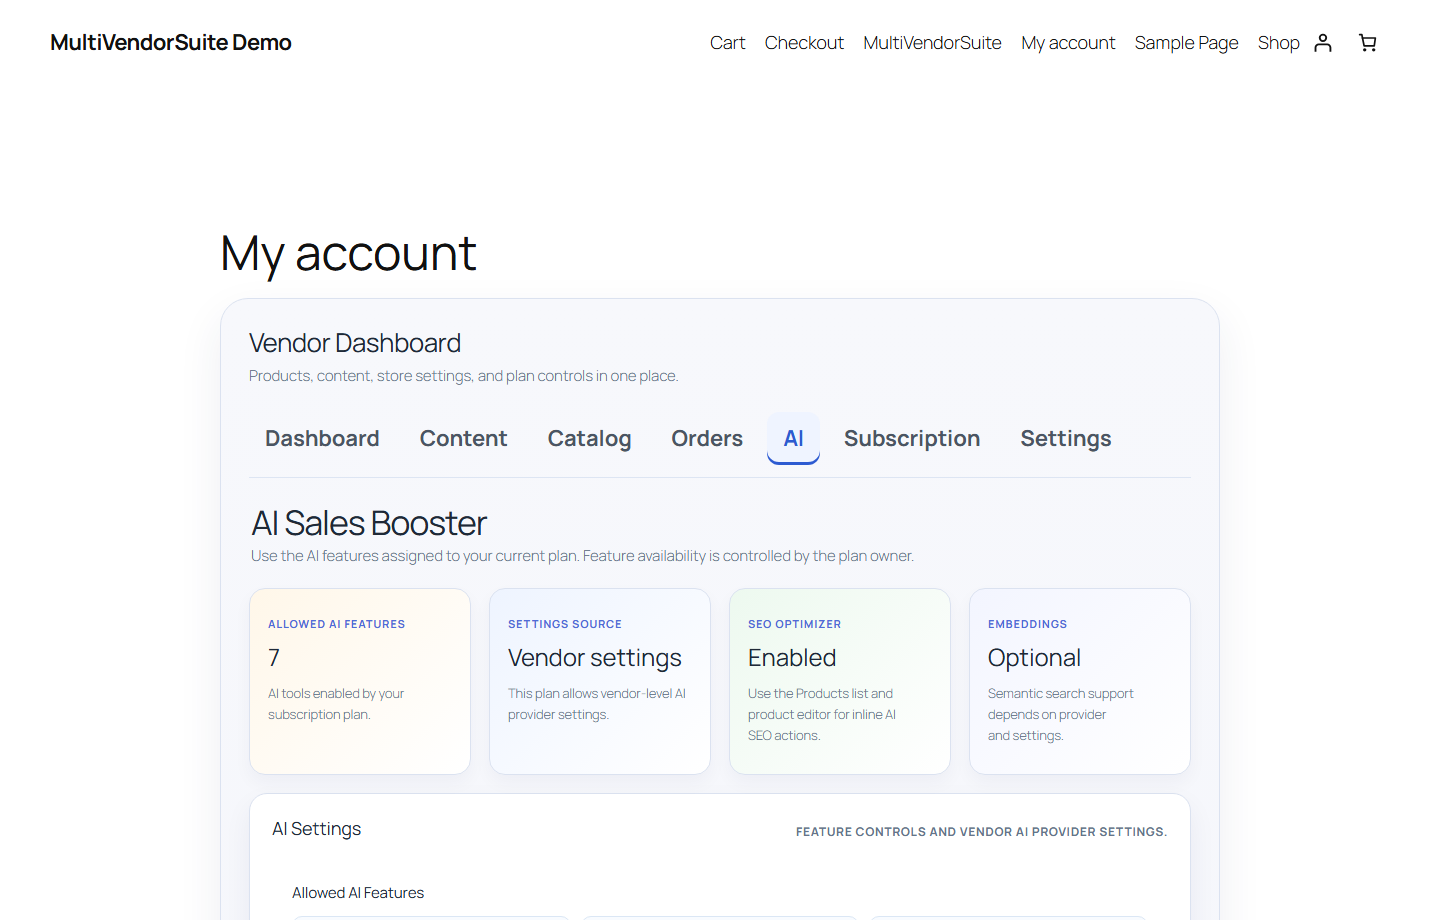
Review dashboard, content, catalog, orders, AI, subscription, and settings tabs.
Confirm the vendor can access only the tools allowed by the assigned plan.
Catalog and order workflow
Vendors can work with catalog and order screens without needing full store administration access.
Use the Catalog tab to add or review products, categories, coupons, and import/export options.
Use Orders to review relevant fulfillment details.
Place a test order and confirm the vendor sees the correct order information.
Withdrawals and reports
Use withdrawal and reporting screens to review seller payout requests and marketplace health before making financial decisions.
Ask a test vendor to submit a withdrawal request.
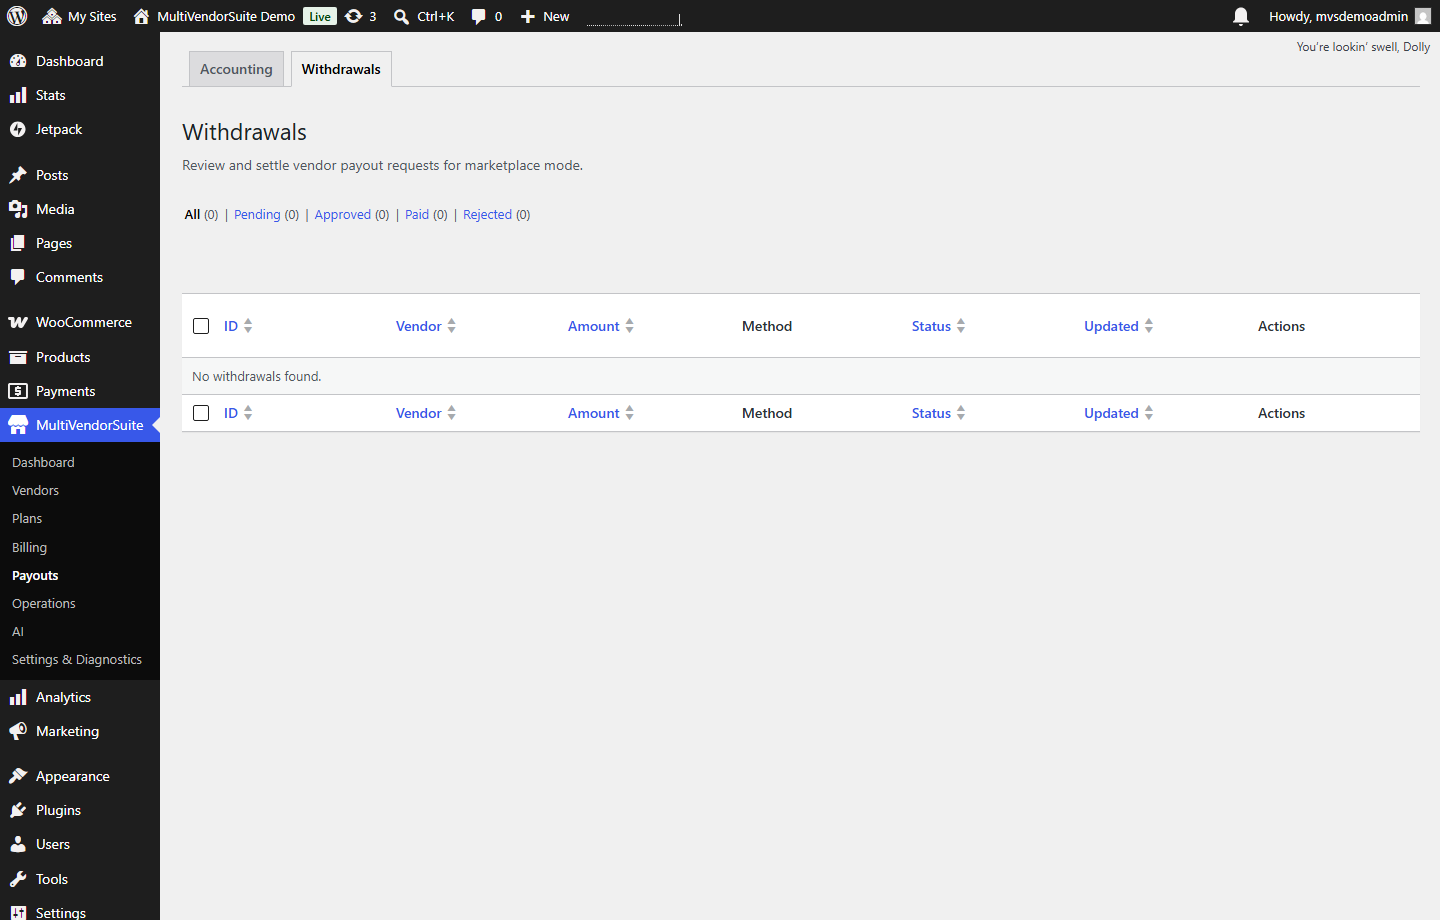
Review the request from the admin withdrawal screen.
Check related sales, commission, order, and accounting information before payout.
AI tools and vendor access
AI tools are plan-controlled. Admins can decide which seller packages may access AI-assisted product and SEO workflows.
Enable AI access only on plans that should include AI tools.
Confirm provider settings and API key handling before public use.
Review AI-generated product text, SEO output, and images before relying on them in production.
Demo media
See the marketplace workflow before setup
Use these demo captures to understand how the admin area, vendor records, withdrawal review, and launch QA screens should look after installation.
Complete admin and vendor walkthrough
Review the complete demo dashboard, marketplace menu, plans, vendor controls, product workflow, store settings, and operational checks before publishing live access.
Confirm dashboard numbers and status cards
Review vendor and plan access screens
Check withdrawal request handling
Validate demo user permissions before sharing login access
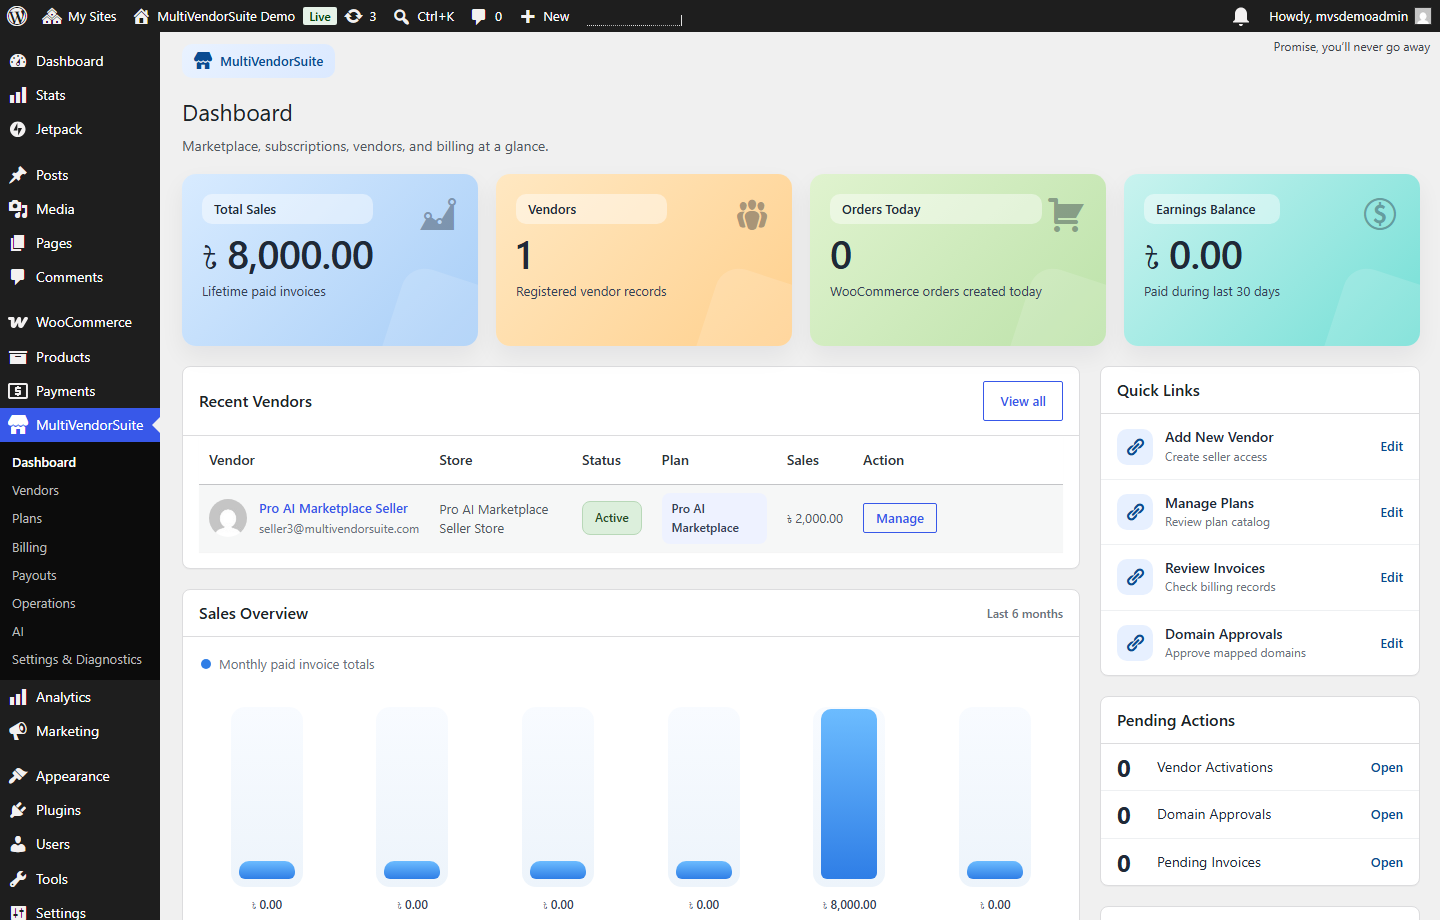
Admin marketplace dashboard
Review sales, vendors, orders, earnings, pending actions, and marketplace health from one dashboard.
Withdrawal request screen
Track vendor payout requests with clear status filters and admin review controls.
Plan setup details
Configure billing, store access, limits, commissions, and seller capabilities from one plan screen.
Frontend vendor center
Validate the seller dashboard experience for products, orders, subscriptions, AI tools, and store settings.
Frontend vendor workflow
What vendors should experience
The frontend vendor panel should stay focused on daily seller work: products, orders, earnings, withdrawals, store profile, plan access, and AI tools.
Vendor dashboard
Start
Getting started
Install the plugin, confirm WooCommerce settings, create vendor plans, and publish the pages vendors need to apply, sell, and manage their marketplace activity.
Installation requirements
Plugin upload and activation
WooCommerce currency, checkout, and permalink checks
Core pages and vendor center setup
Mode
Marketplace mode
Use marketplace mode when many vendors sell through one shared WooCommerce storefront while admins control vendor access, commissions, orders, and withdrawals.
Vendor registration and admin review
Frontend vendor dashboard
Product submission and publishing controls
Vendor orders and fulfillment visibility
Stores
Separate-store mode
Use separate-store mode for subscription sellers who need their own WordPress multisite store, subdomain, custom domain workflow, and plan-controlled features.
WordPress multisite requirements
Wildcard DNS and SSL planning
Seller store provisioning
Domain mapping and approval flow
Plans
Vendor plans and feature access
Plans define what vendors can access, including product limits, downloadable products, coupons, store settings, shipping, payments, AI tools, and separate-store capabilities.
Automatic hidden WooCommerce product linking for plans
Feature gates and usage limits
Vendor plan purchase and activation
Upgrade and renewal checks
Checkout
Payments, shipping, and payouts
Configure only supported WooCommerce methods, keep vendor credentials separate, and test checkout, commissions, withdrawal requests, and payout records before launch.
Supported shipping methods
Supported payment gateway settings
Commission calculation workflow
Withdrawal request review
AI
AI tools and provider settings
AI tools are controlled by vendor plans. Admin keys and vendor keys remain separate, and vendor provider settings appear only when the assigned plan allows them.
AI product content tools
AI SEO/product optimizer actions
Image generation workflow
Vendor-specific API key handling
Fixes
Troubleshooting and launch checks
Use the launch checklist before opening paid sales. Confirm activation, checkout, vendor access, emails, DNS, SSL, demo safety, backups, and restore flow.
Activation and fatal error checks
Permalinks and page routing
Email and transactional message tests
Backup, restore, and rollback checks
Launch QA
Do not launch before these tests pass
Fresh install
Install on a clean WordPress and WooCommerce site, activate the plugin, and confirm no fatal errors.
Checkout flow
Buy a vendor plan, activate the vendor, create and publish a product, place an order, and review commissions.
Demo safety
Confirm demo users cannot delete critical data, install plugins, export secrets, or change production settings.
Backup and restore
Back up product and demo sites, then run at least one restore test before public traffic.
FAQ
Documentation questions
Start with installation, WooCommerce setup, vendor plans, marketplace pages, and one complete test purchase before configuring advanced multisite or AI tools.
Only separate-store mode requires WordPress multisite. Normal marketplace mode can run on a standard WooCommerce site.
Vendor payment settings depend on the assigned plan and supported gateway. Admin and vendor credentials must remain separate.
Use guided video or request-only access until demo reset, backups, permissions, and destructive-action safeguards are proven.
Need help launching your marketplace?
SoftPHP can help with installation, multisite, wildcard DNS, SSL, domain mapping, payment testing, demo content, and launch checks.